 Probably the thing I love most about fly tying is that there are limitless possibilities for experimentation and how each experiment builds on the lessons of previous ones. You take a certain technique or style you’ve tried in the past and blend it with another (previously disparate one) to create an entirely new avatar. You might say that all of our current flies are standing on the shoulders of giants. And the pattern I’m about to share with you is a perfect example.
Actually, it’s less of a “pattern” per se and more of a generic design template that can be altered to a myriad of more specific patterns by customizing the materials, colors, size, etc. As a tenkara angler, of course I tie sakasa kebari style flies. And you may know in the past, I’ve experimented with palmered flies and double glass bead flies for tenkara. Both worked exceptionally well, so it occurred to me that if I combined all three design principles, the result would produce a fly with some really interesting characteristics.
Half-Palmer Sakasa Kebari Recipe
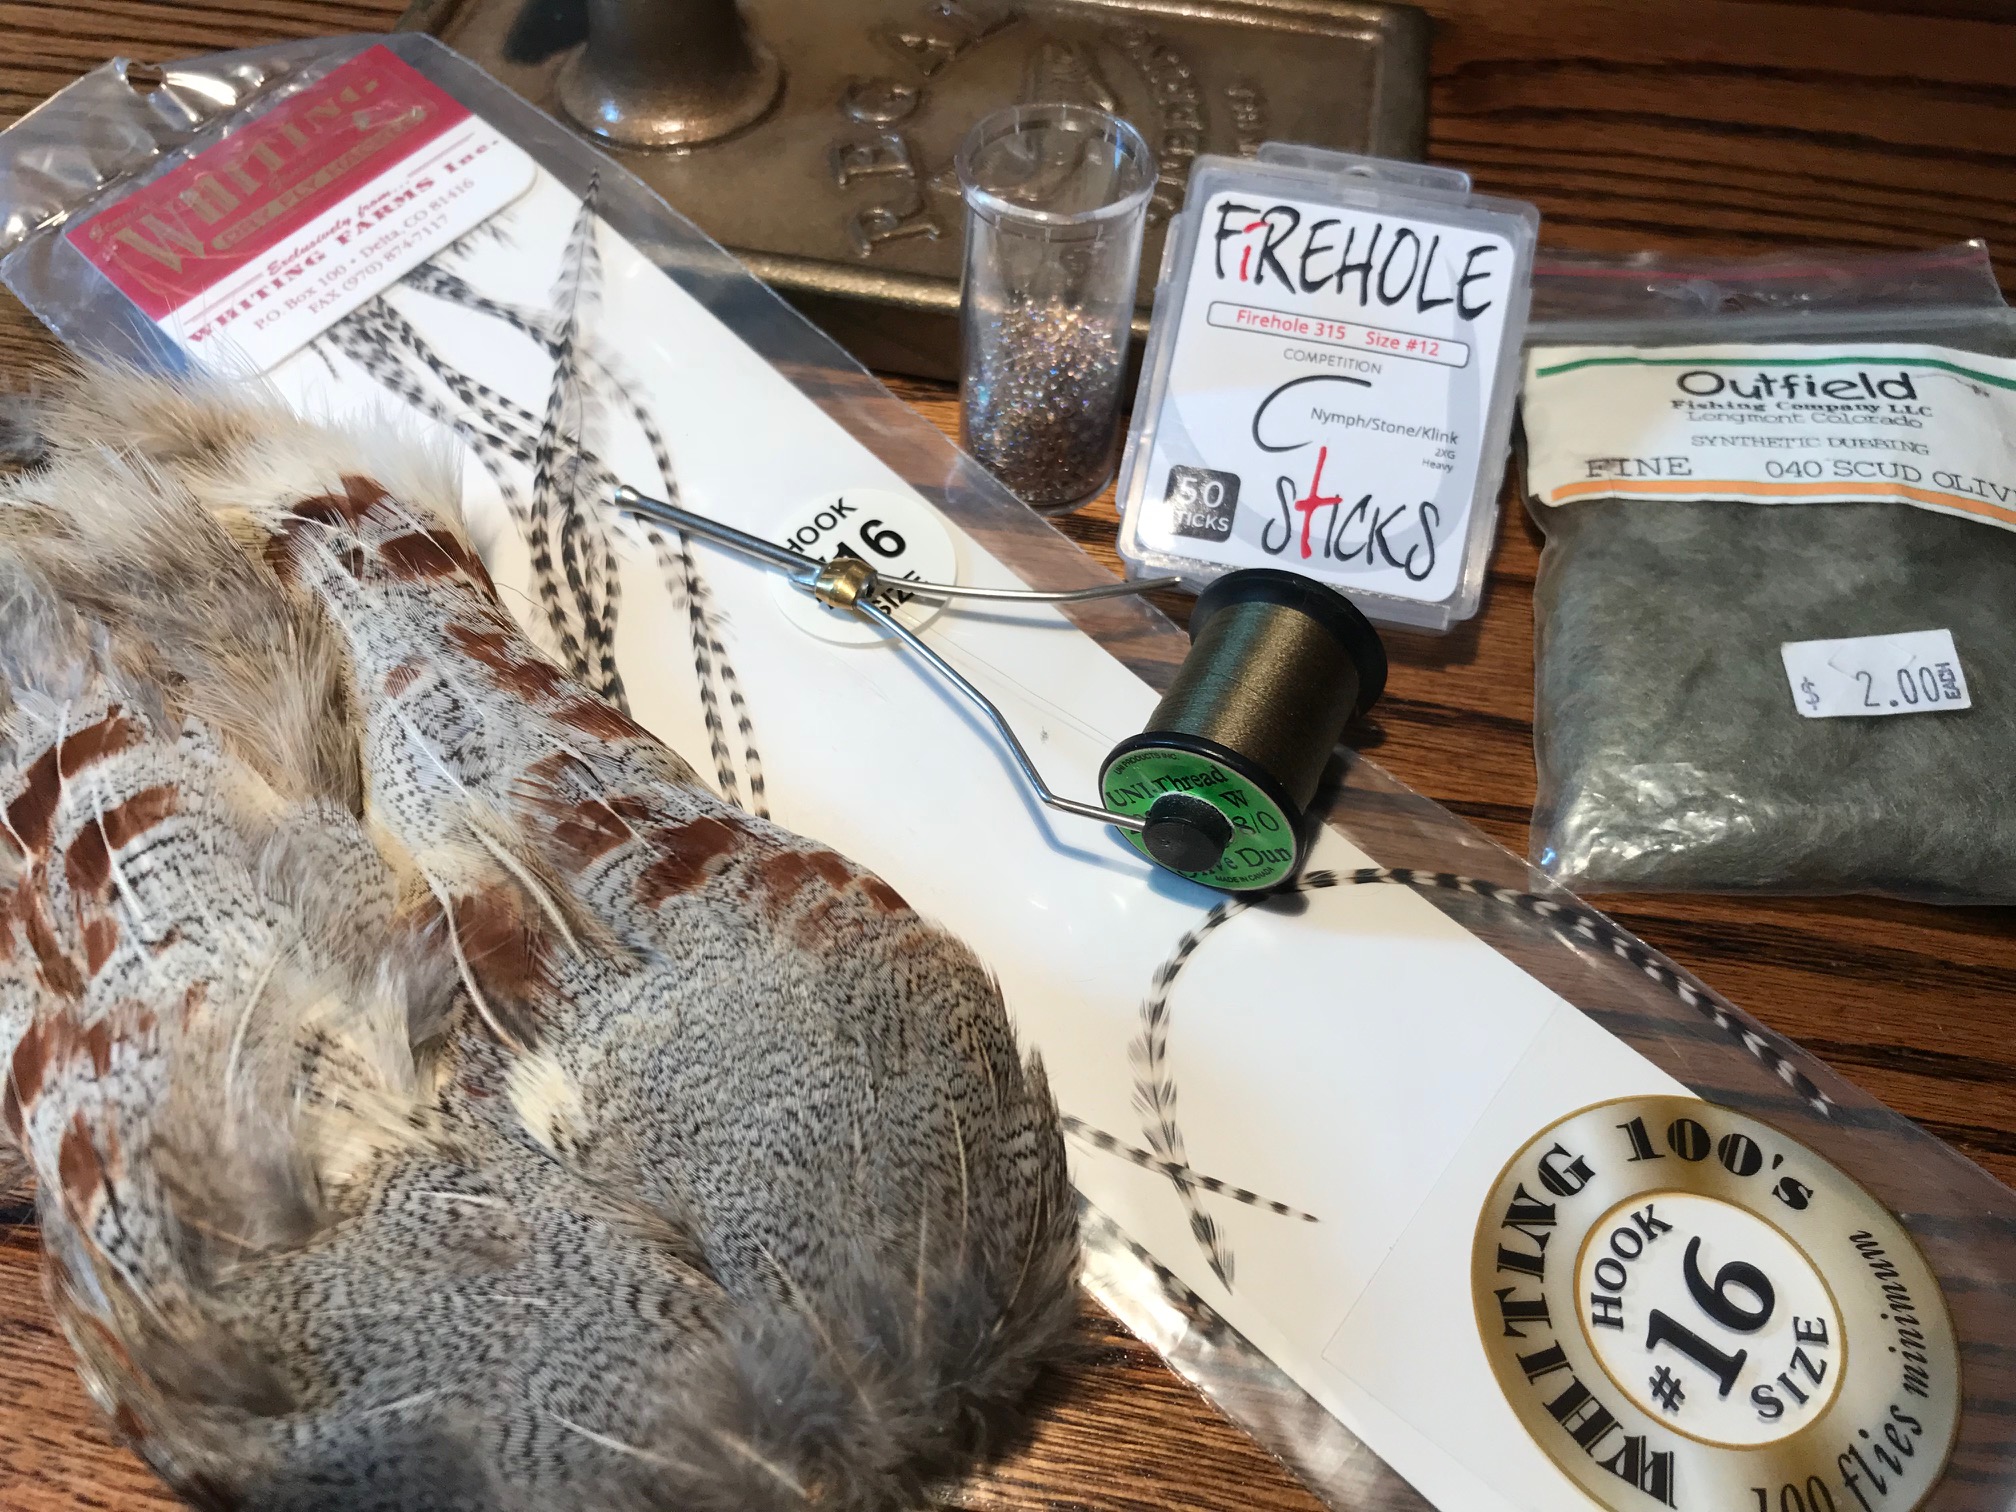 Before I go into the design theory behind this fly, I’ll give you the recipe. But as I mentioned, this is merely a base template that you can interpret any way you want.
Hook: Firehole Firesticks 315 #12
Thread: Uni 8/0, olive dun
Head: Two tan/pearl small glass beads*
Front Hackle: Partridge, natural, sakasa kebari style
Thorax: Outfield scud olive dubbing**
Palmer Hackle: 4 wraps of dry fly grizzly, 2X smaller than hook size
Body: Thread**
Tying Notes
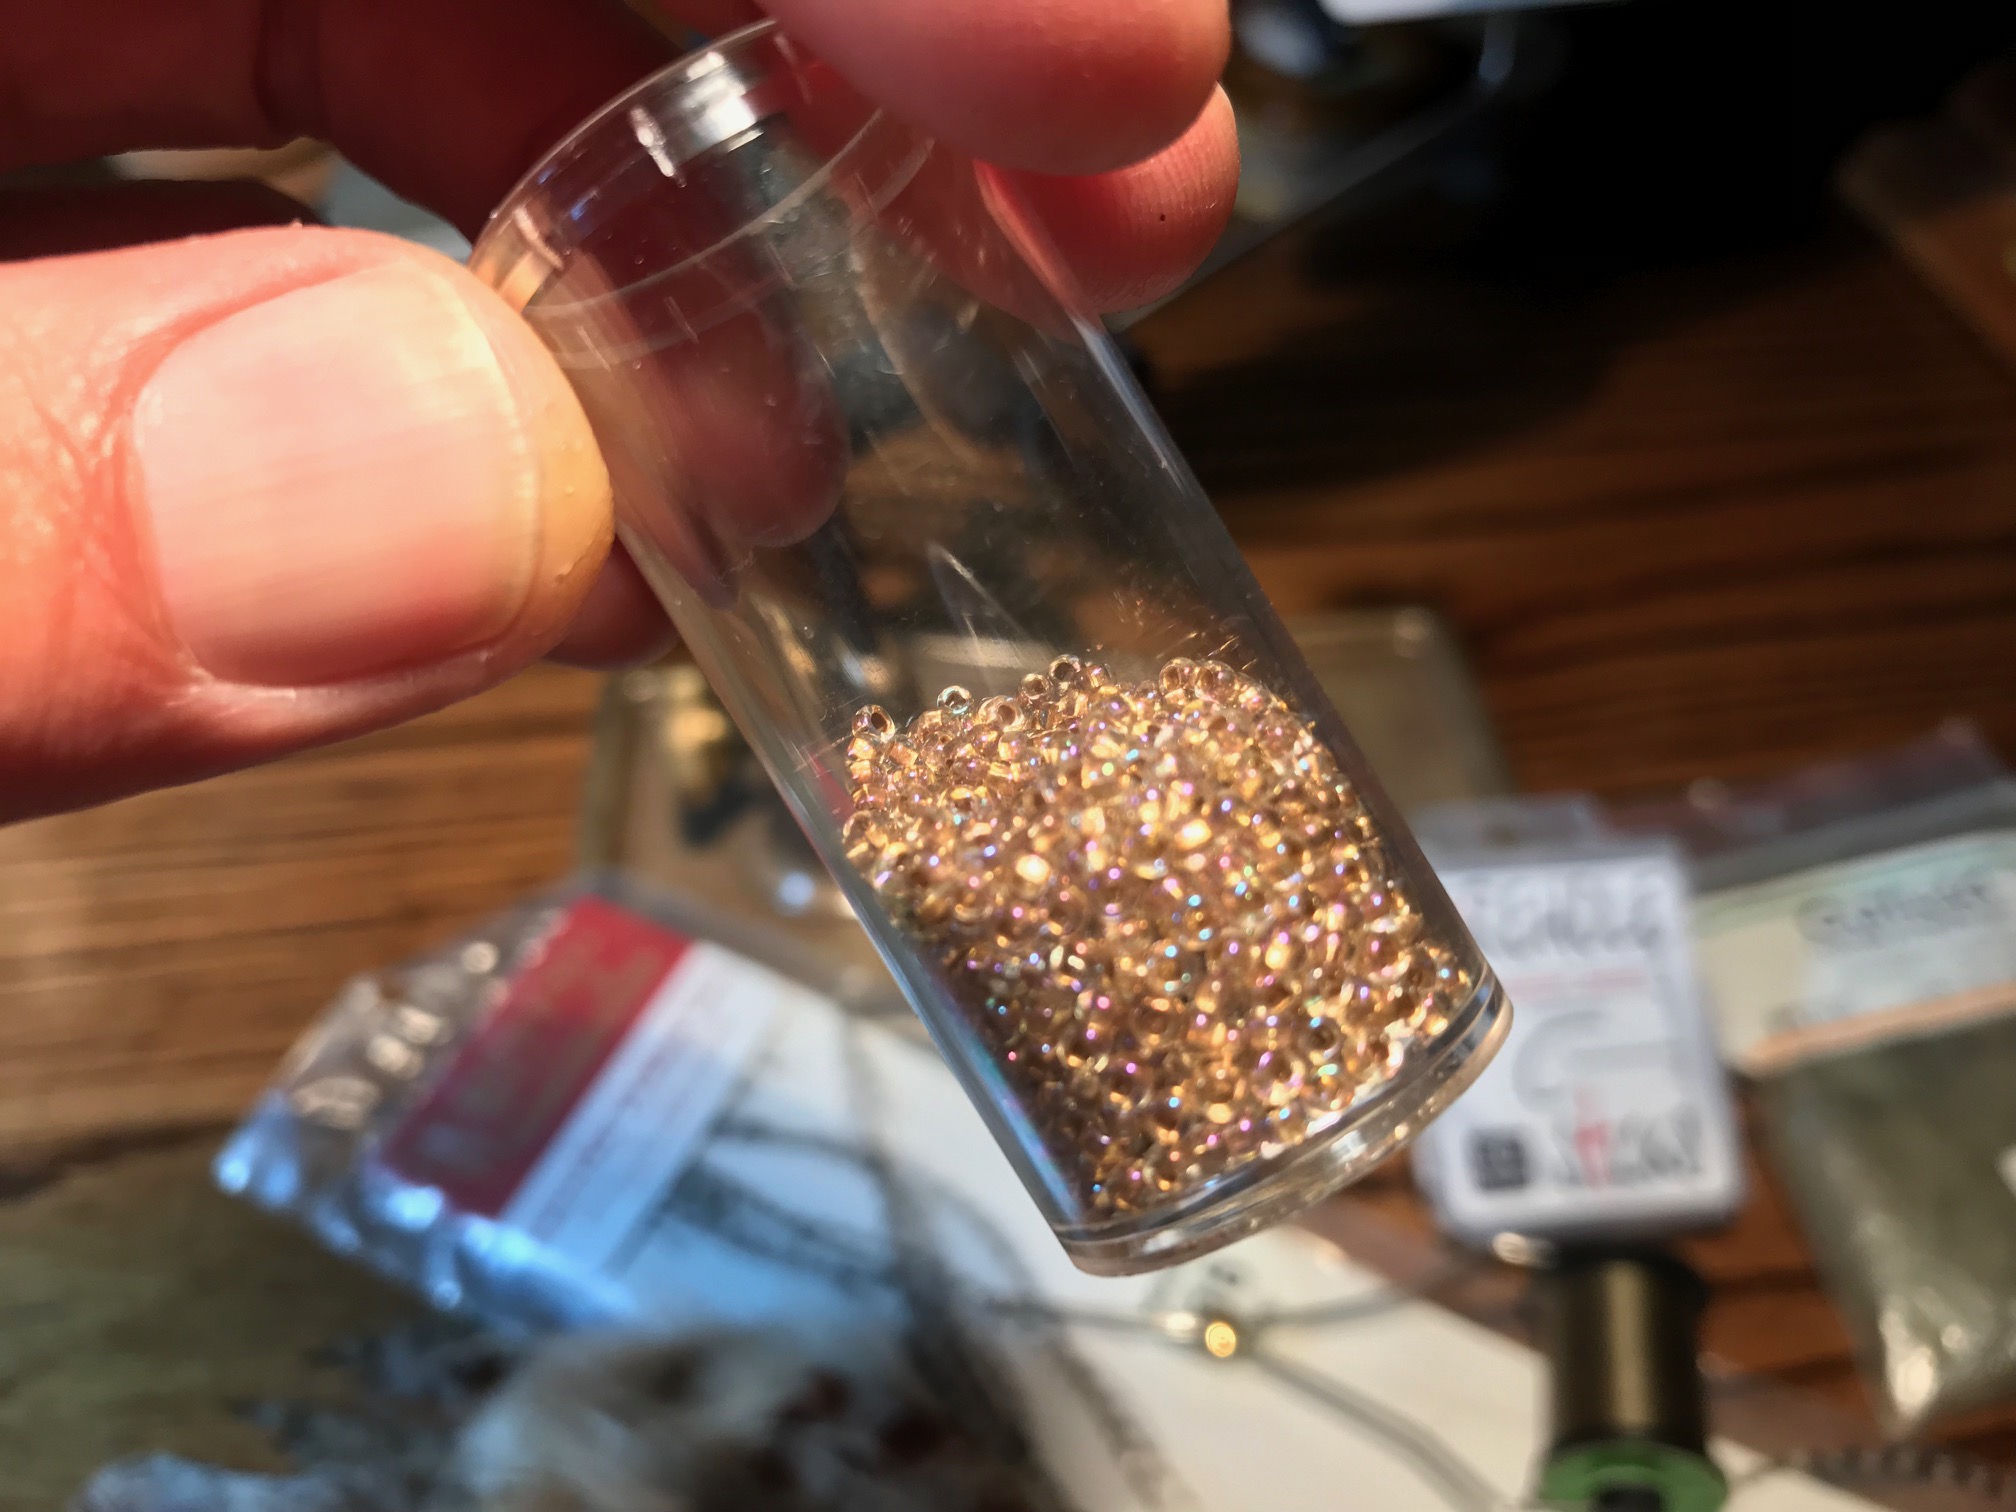
*The tan/pearl glass beads I bought many years ago in a bead shop and I’m not sure what the equivalent would be if you purchased them from a fly-tying vendor. But they’re a very light tan, with a pearlescent flash and a bluish and pinkish tint. If anyone finds them, please let me know because my supply is running low.
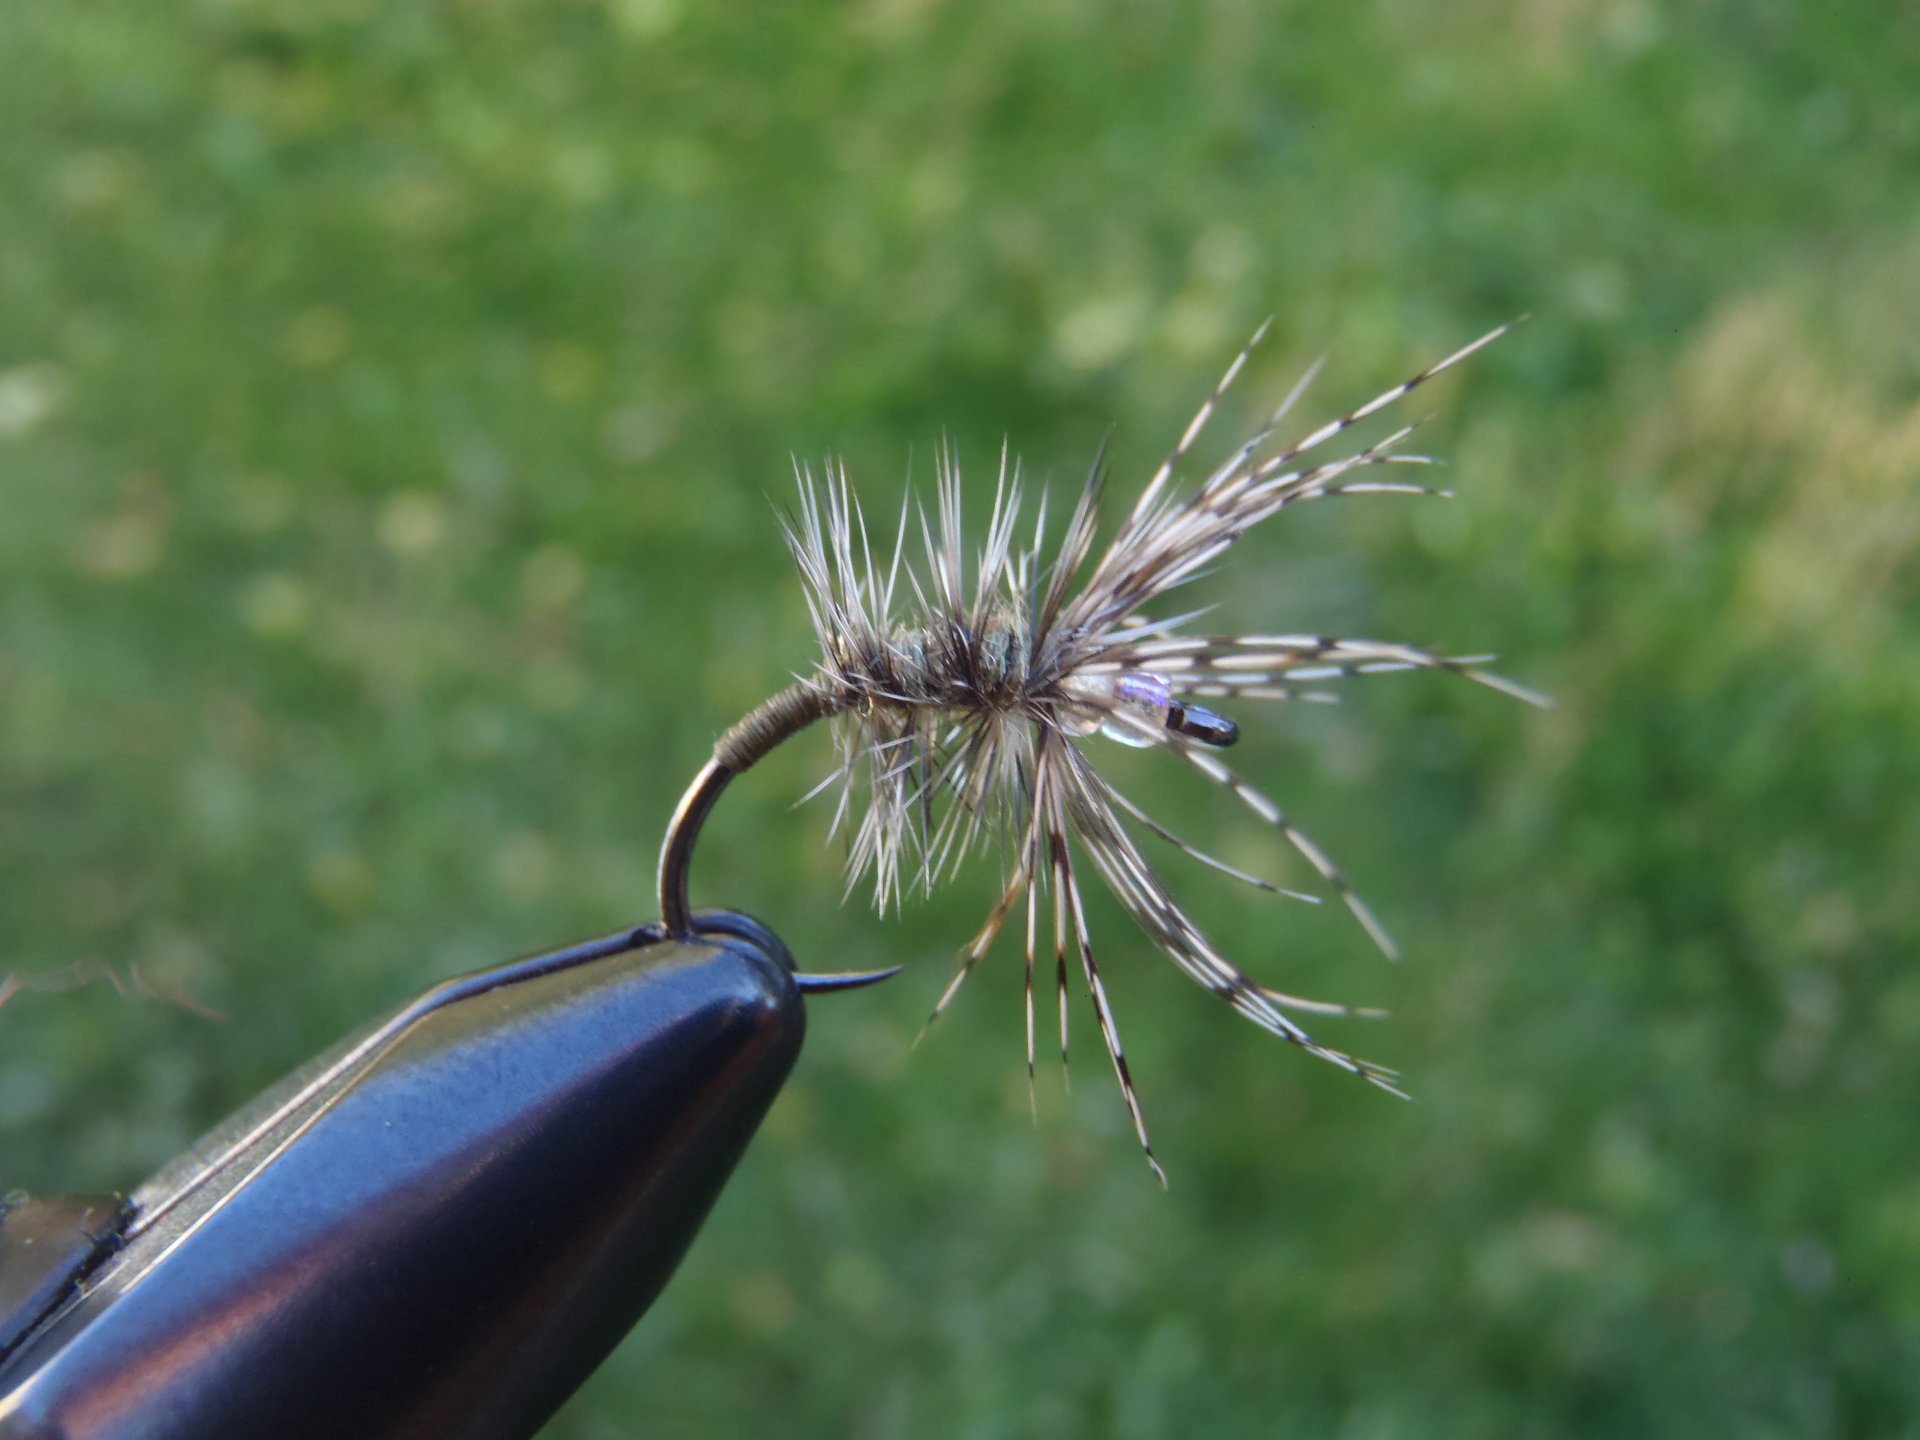
 **The proportions of the dubbed part of the body and the thread part of the body are 50% each of the remaining portion of the hook shank behind the beads down to about where the barb would normally be (the hooks I’m using in the recipe above are barbless).
Theory Behind the Design
Now that the recipe is out of the way, I’d like to explain the concept behind my design. You might look at the picture above and say, “yeah, that fly looks buggy so I’m sure it will catch fish.” But I actually have some principles behind the design that might not be apparent at first glance.
 The “Triangle” Profile
Many nymphs such as mayfly clingers and stoneflies have a triangular silhouette–they’re broader at the shoulders and head, with protruding front legs and then taper down to a thinner abdomen and tails. It’s a shape fish are used to seeing and readily identify as food. Think about when you scan the results of a Google Image search. You’re looking through hundreds of photos and your brain is rapidly picking out the most recognizable key characteristics you’re looking for. If you’re looking for a specific style of shoe, maybe you have a predetermined shape and color you’re scanning. You’re not immediately paying attention to finer details like the laces, or the stitching. You’re operating on impressions and the trout do the same because they have a short window to determine if something drifting by is food or not. So, when dead drifted, I wanted this pattern to take advantage of that trigger, and mimic the triangular profile–the one that’s immediately identifiable as food.
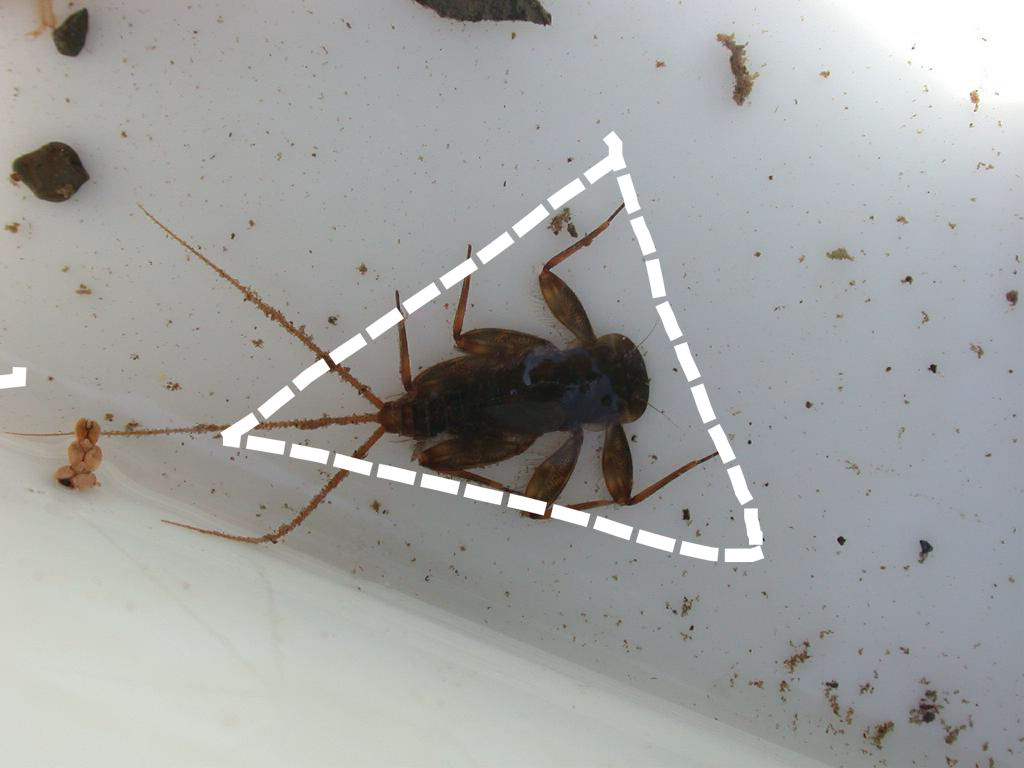
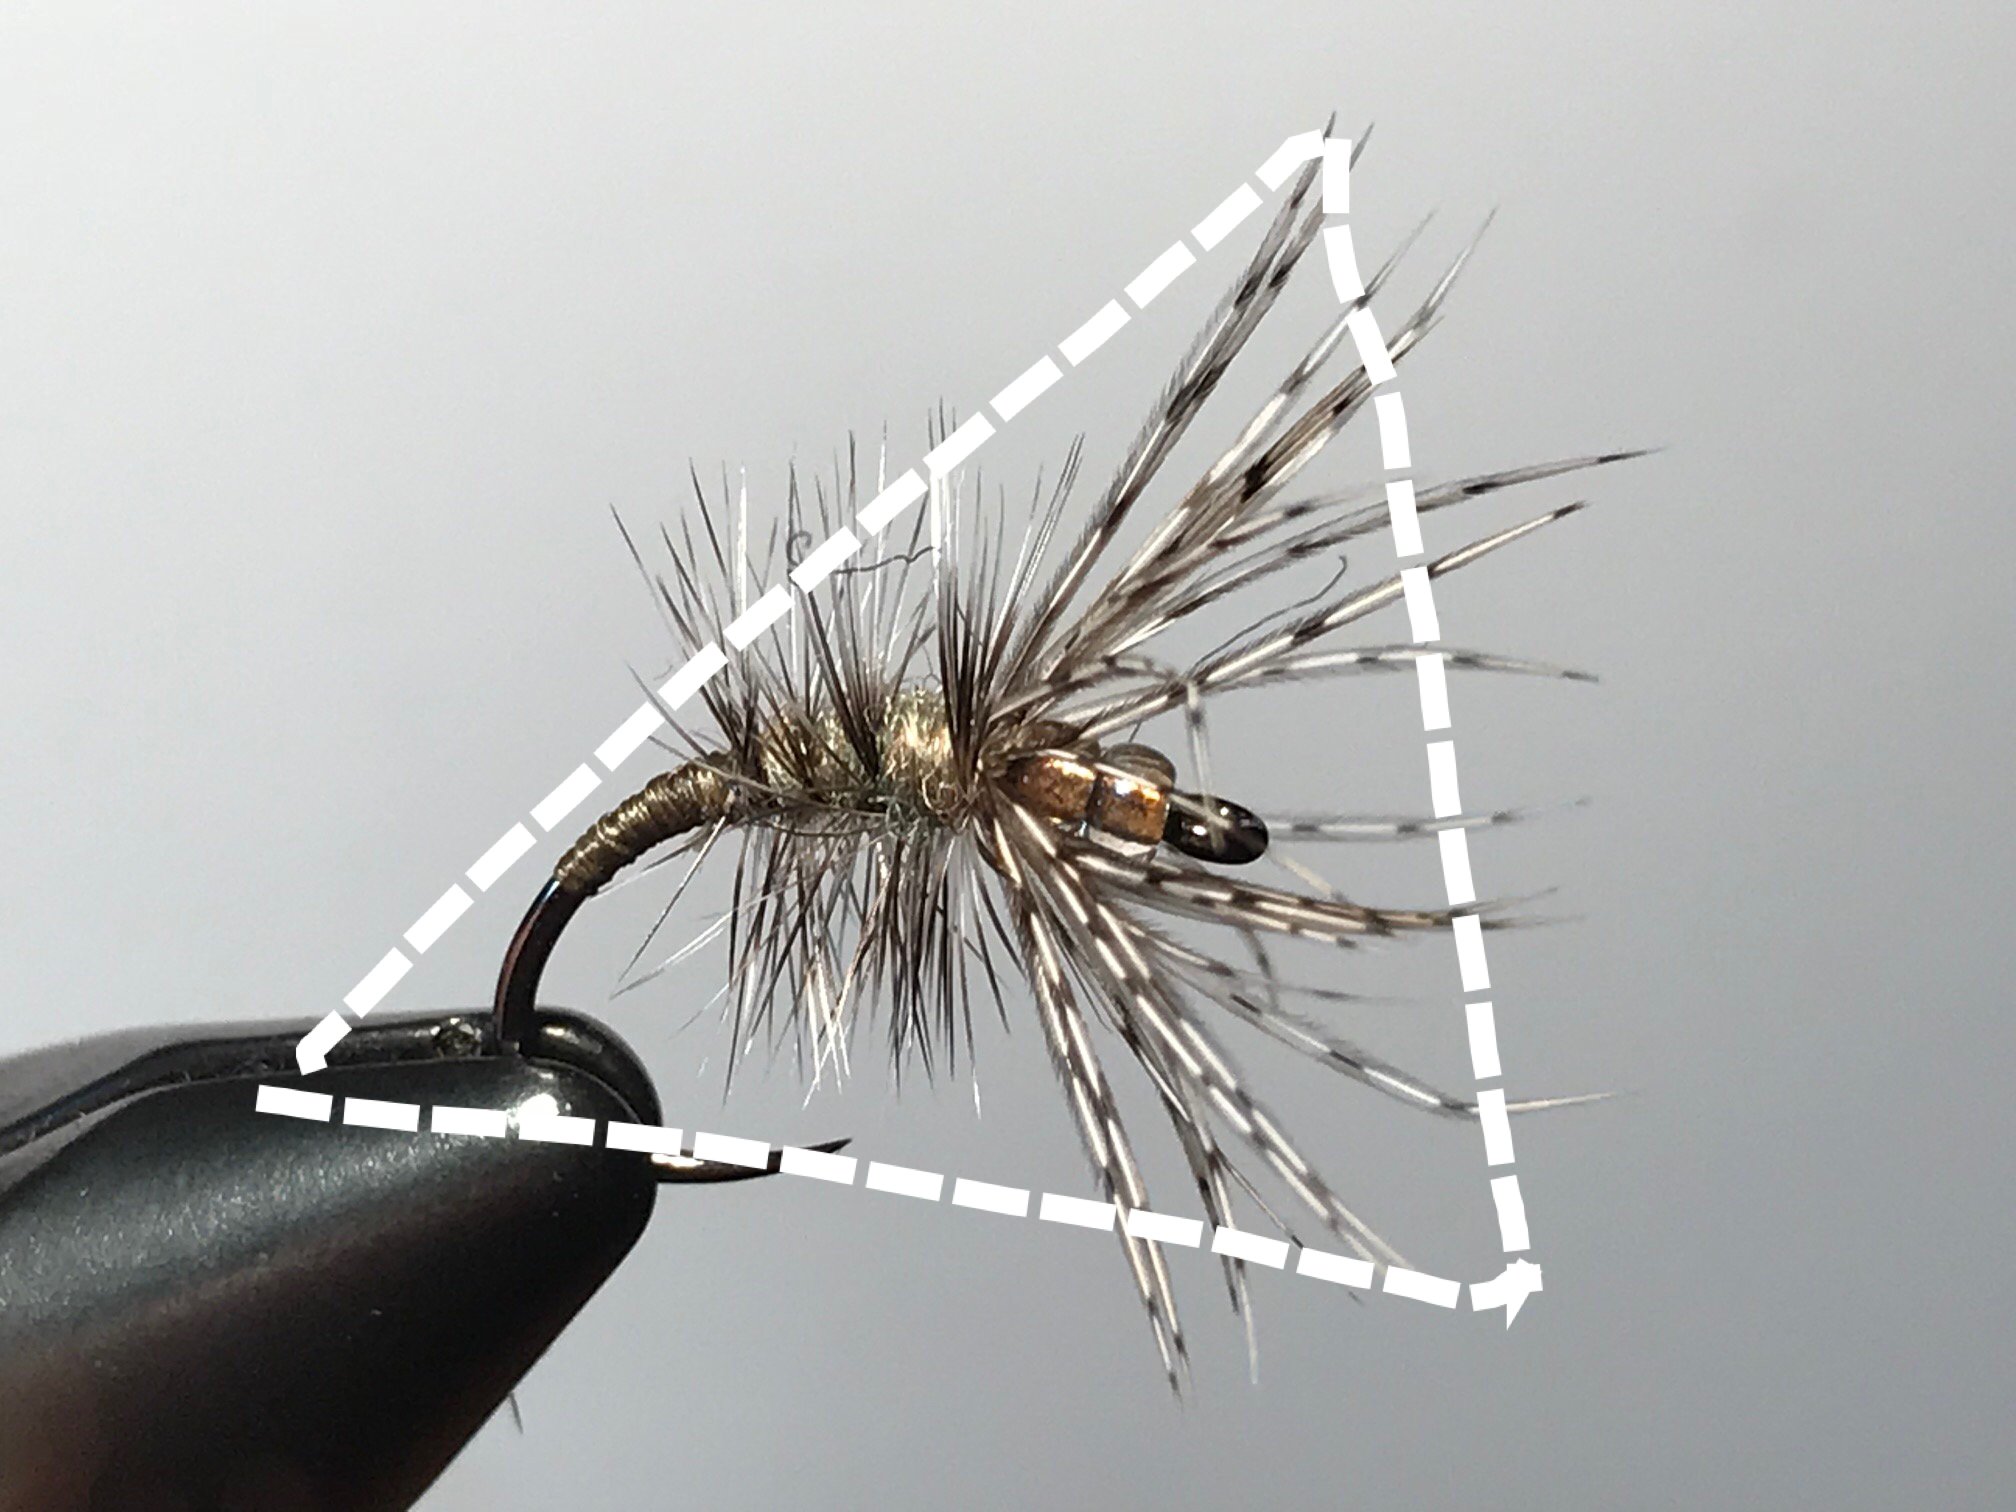
This is accomplished with the broader soft hackle at the front of the fly, tapering down to the shorter palmered hackle behind it, then tapering down even further to a thinner thread body forming an impressionistic triangle. To be fair, most sakasa kebari have this profile to some extent, it’s just more pronounced in this design.
Sinkability
As I shared in my previous article, I want my flies to sink, but not too much. I’ve found that for the streams I fish, the double glass bead heads are just about the perfect density for getting my flies to the right depth, without impeding the cast or inordinatley snagging on the bottom.
Flash
In addition to weight, the glass beads provide just the right amount of subdued flash to catch the trout’s eye, without being so garish as to be off-putting. And the palmered hackle can trap air bubbles adding even more natural looking flash.
Movement and Resistance
While the half-palmered hackle serves to form the triangular profile when dead drifted, it also plays an important, perhaps less obvious role in the fly’s hydrodynamics when employing sasoi techniques such as pulsing the fly. Imagine a weighted fly that is sleek, with little hackle or other materials to create drag in the water. When pulsed, it will bounce up and down erratically in quick bursts because there is nothing to slow it down. The front soft hackle provides most of the lifelike motion of the fly, but the stiffer palmered hackle behind it adds resistance that makes the fly dance with a more insect-like swimming motion when animated. In general, I think people tend to move their tenkara flies too much and too fast. It’s not only unnatural, but makes it difficult for the fish to catch. The added resistance slows down the motion of the fly–creating a gentle forward lunge, with a suspended buoyancy when relaxed. I believe this mimics a more recognizable trigger for the fish and gives them more opportunity to physically catch the fly.
Complexity
I’ve written before that I believe one of the characteristics that makes a fly “good” is giving the impression of complexity. After all, a trout’s main quarry sports lots of little appendages, dappled colors, and mottled patterns. This fly has it all–the partridge and grizzly hackle create lots of variegation, the palmered hackle through the dubbing creates segmentation, and the juxtaposition between the flash of the beads and the drab natural materials creates contrast. By substituting different materials, you could easily enhance this effect.
How to Fish It
The short answer is: just as you would any other sakasa kebari. It’s a versatile design that can be used with any of the presentation techniques I outline here. Because of it’s profile, it’s convincing in a dead drift, and with its soft hackle, it’s incredibly lifelike when given motion. As I do usually do when fishing sakasa kebari, I first make a few upstream dead drifts, then, turn around and try some downstream swings or pulses. Neither seems to be consistently more effective than the other–as with so many things in fly fishing, it all depends on the day.
As far as I know, no one has combined all of these design principles into one pattern so I consider it to be unique and I will be using it as a template for ongoing experimentation. As always, if you come up with your own versions, please share pictures in the comments section below and let us know your experience with them on the water!


Very nice!!!
Will you be creating a video of this pattern and adding it to your YouTube channel in the future?
Hi Jeff. Sure, I will.
Looks “buggy” and fun to tie! Great article as always. Thank you for sharing!
Thanks for the article Jason! I agree with your concept of the shape, but would like to offer an addition to the “buggy” fly. It relates to stream water conditions. Numerous guide friends, and I have also heard Kelly Galloup mention it numerous times; if the water is off colored, and overcast day, or the water is moving so fast the fish couldn’t have the time to examine a fly, they are going to “mouth the fly” instead of look at it. The more buggy the fly the more likely it is going to feel like food in their mouth, instead of some other debris floating with in current. It’s all good.
Hi Mark, excellent point! I’ve observed trout actually doing this. A long time ago, I remember patterns tied with soft yarn underbodies so they felt “chewy” to the trout. I think the stiff hackle Palmer on my flies also helps them feel softer like a real insect.
That is a beautiful fly gotta try to tie it thanks for sharing Jason!